

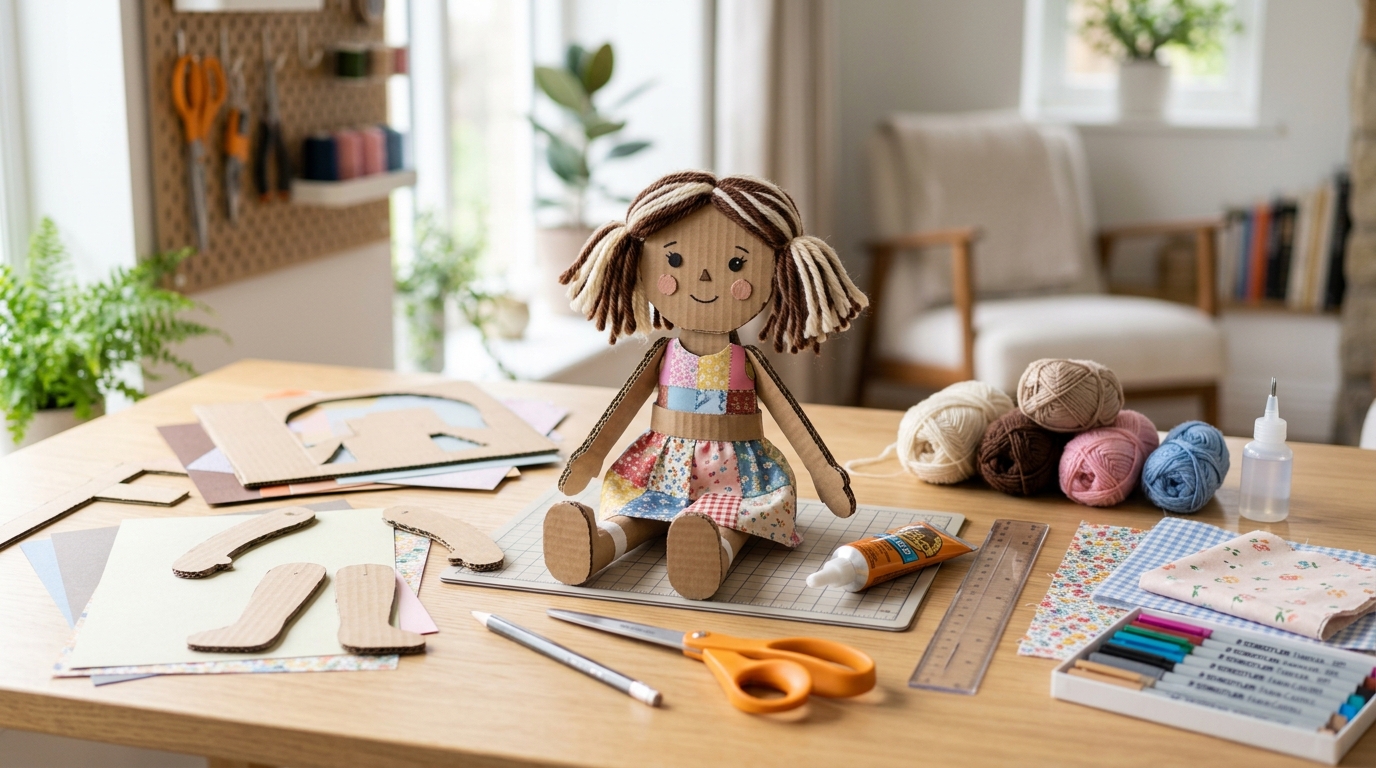
How to Make a Cardboard Ragdoll: Easy DIY Guide for Beginners
Making a cardboard ragdoll is a creative and enjoyable craft project that turns simple household materials into a handmade character. If you enjoy DIY crafts, paper crafts, or handmade toys, learning how to make a cardboard ragdoll can be a rewarding activity. Cardboard is affordable, easy to find, and simple to shape, which makes it a practical material for creating a decorative or movable doll at home.
A cardboard ragdoll can be designed in many different ways depending on the style, size, colors, and materials you prefer. You can create a simple flat doll or make a more detailed design with separate arms, legs, clothing, hair, and facial features. The process does not require complicated equipment, but patience and careful cutting can make the finished result look much better.
This guide explains the complete process of how to make a cardboard ragdoll, from choosing the right materials to drawing, cutting, assembling, decorating, and protecting the finished doll. Whether you are new to crafting or already enjoy handmade projects, the steps below can help you create a cardboard ragdoll with a neat and personalized appearance.
What Is a Cardboard Ragdoll?
A cardboard ragdoll is a handmade doll created primarily from cardboard and other simple craft materials. The word ragdoll traditionally refers to a soft handmade doll, but modern DIY projects can use the same general doll concept with materials such as cardboard, paper, fabric, yarn, and decorative supplies. A cardboard version can be flat, layered, articulated, or decorated to resemble a traditional handmade character.
The main structure of the doll usually includes a head, body, arms, and legs. These parts can either be cut as one connected shape or created separately and attached afterward. Separate parts are especially useful when you want the arms and legs to move. The construction can remain simple, or additional layers can be added to create clothing, hair, shoes, accessories, and other details.
One of the most appealing aspects of a cardboard ragdoll is its flexibility. You are not limited to one particular shape or appearance. The size and design can be adjusted according to the cardboard available and the final purpose of the craft. A small doll can be used as a decorative craft, while a larger design can become a creative handmade display.
Why Make a Cardboard Ragdoll?
Making a cardboard ragdoll is an inexpensive way to spend time creatively. Many of the required materials are commonly available at home, so there is often no need to purchase expensive craft supplies. Old packaging boxes, cereal boxes, paperboard, and other clean cardboard materials can sometimes be reused for the basic structure.
The project can also help develop practical crafting skills. Drawing shapes, measuring proportions, cutting along outlines, arranging materials, and assembling different parts all require attention and coordination. Working slowly and carefully can improve precision and help create a cleaner final result.
Another benefit is customization. A manufactured toy has a fixed appearance, but a handmade cardboard ragdoll can be changed according to your preferred colors, hairstyle, clothing, facial expression, and body shape. The finished doll can therefore feel more personal because the design comes directly from your own creative decisions.
Cardboard crafts can also encourage material reuse. Instead of immediately throwing away suitable cardboard packaging, you can turn it into a new creative project. Clean and undamaged cardboard can provide a useful base for many handmade crafts, including dolls, decorations, ornaments, and display pieces.
Materials Needed to Make a Cardboard Ragdoll
Before starting the project, collect all the materials you expect to need. Having everything prepared in advance makes the crafting process more organized and reduces interruptions while you are cutting and assembling the doll.
The most important material is cardboard. Choose cardboard that is strong enough to maintain its shape but not so thick that it becomes difficult to cut. Medium-weight cardboard is generally easier to work with because it provides a balance between strength and flexibility.
You will also need a pencil for outlining. A ruler can help when you want straight edges or consistent measurements. An eraser is useful for correcting unwanted lines before cutting the cardboard.
Scissors are suitable for thinner cardboard, while a craft knife can be useful for thicker material. Because sharp cutting tools can cause injuries, they should always be handled carefully and used on an appropriate cutting surface. Children should have adult supervision when sharp tools are involved.
Glue or double-sided tape can be used to attach paper, fabric, hair, clothing, and other decorative pieces. Craft glue is useful when you need a stronger connection, while tape can be convenient for certain lightweight components.
Colored paper, markers, crayons, pencils, fabric scraps, yarn, ribbons, and other decorative materials can be used to create the appearance of the doll. You do not need to use every available material. The best choice depends on the design you want to create.
How to Make a Cardboard Ragdoll Step by Step
Learning how to make a cardboard ragdoll becomes much easier when the project is divided into manageable stages. The most important thing is to avoid rushing through the cutting and assembly process. A carefully prepared design will usually produce a cleaner and more balanced finished doll.
Step 1: Choose and Prepare the Cardboard
Start by selecting a clean piece of cardboard that is large enough for the desired doll. Remove any tape, labels, staples, or unwanted packaging material. If the cardboard has been folded, flatten it as much as possible before drawing the design.
The surface should be reasonably smooth because wrinkles or damaged areas can make drawing and cutting more difficult. If you are reusing packaging cardboard, inspect both sides and choose the side that provides the cleanest surface for your design.
Place the cardboard on a flat working surface. Make sure you have enough room to draw the complete body without having to reposition the cardboard repeatedly. Good preparation at this stage can make the rest of the project easier.
Step 2: Plan the Ragdoll Design
Before cutting anything, decide what you want the finished ragdoll to look like. Consider its overall height, body shape, head size, arm position, leg position, hairstyle, and clothing.
A simple design is often easier for beginners because it reduces the number of complicated cuts and attachments. You can gradually add more details once you become comfortable with the basic construction.
Think about the proportions of the doll as well. The head, body, arms, and legs should work together visually. A basic pencil sketch on paper can help you plan the design before transferring it to cardboard.
Step 3: Draw the Main Outline
Use a pencil to draw the ragdoll outline directly onto the cardboard. Start with the head and body, then add the arms and legs. Keep the lines clear enough to follow during cutting.
If you want a symmetrical design, you can create a center guideline and use it to keep both sides reasonably balanced. A ruler can help with straight sections, while curved areas can be drawn freehand.
Do not press the pencil too heavily at first. Light lines are easier to erase and adjust if you decide to change the shape before cutting.
Step 4: Cut Out the Main Body
Once you are satisfied with the outline, carefully cut around it. Follow the pencil line slowly rather than trying to finish the entire shape quickly.
If the cardboard is thick, several controlled cuts may be safer and cleaner than forcing the scissors through the material. Keep your fingers away from the cutting path and work on a suitable surface.
After cutting, inspect the edges. Remove small uneven pieces where necessary, but avoid repeatedly trimming the same area because excessive cutting can change the intended proportions.
Step 5: Create Separate Arms and Legs
If you want your ragdoll to have movable limbs, cut the arms and legs separately from the main body. This approach allows you to attach them with simple joints.
Draw each limb carefully before cutting. Try to make corresponding parts similar in size and shape. Balanced limbs can make the finished doll look more polished.
If movement is not important, the limbs can remain attached to the main body. A connected design is simpler and can be especially suitable for decorative cardboard dolls.
Step 6: Create the Face
The face is one of the most noticeable parts of a handmade ragdoll. Use a pencil to lightly mark the positions of the eyes, nose, and mouth before adding permanent details.
Markers, colored pencils, paint, or small pieces of colored paper can be used to create facial features. Keep the features appropriate to the overall size of the doll so they do not overwhelm the face.
Take your time when drawing the eyes because small differences can affect the appearance of the entire character. If you are using paper pieces, arrange them first without glue so you can check their position.
Step 7: Add Hair
Hair can be created using yarn, paper strips, fabric, or other lightweight materials. Yarn can provide a textured appearance, while paper can be shaped and layered into different hairstyles.
Measure the material before attaching it. Too much material can make the head appear crowded, while too little may leave the hairstyle looking incomplete.
Apply glue carefully and allow the adhesive to set before handling the hair too much. A neat attachment point can make the final doll look more finished.
Step 8: Add Clothing
Clothing gives the cardboard ragdoll additional personality and visual detail. You can draw clothing directly onto the cardboard or create separate clothing pieces from colored paper or fabric.
When using separate pieces, measure them against the body before attaching them. Clothing should fit the body without covering important facial or structural details.
Layering lightweight materials can add depth to the design. However, avoid adding excessive weight because heavy decorations may bend the cardboard or cause small parts to detach.
Step 9: Assemble the Movable Parts
If your design includes separate arms and legs, attach them after decorating the individual pieces. Small fasteners, paper brads, or carefully placed connectors can allow the limbs to rotate.
Make sure the attachment points are secure without being so tight that movement becomes impossible. If the joint is too loose, the limb may not remain in the desired position. If it is too tight, the cardboard can become damaged during movement.
Test each joint gently before adding additional decorations. Once the structure works properly, you can finish the remaining details.
Step 10: Add Final Decorations
The final decoration stage is where you can refine the appearance of the cardboard ragdoll. Add small details such as patterns, shoes, accessories, buttons, ribbons, or other lightweight decorative elements.
Try to maintain a visual balance. Too many details can make the doll look crowded, while a few carefully placed details can make the design look cleaner.
Check the entire doll from top to bottom after decorating. Look for loose materials, visible glue, rough edges, or areas that need additional finishing.
How to Make a Cardboard Ragdoll Look More Realistic
Creating a realistic-looking cardboard ragdoll is mainly about adding depth, texture, and carefully planned details. Since cardboard is naturally flat, layering different materials can help the finished doll appear more dimensional.
One useful approach is to build clothing from several thin layers. This can create the appearance of separate garments without making the doll excessively heavy. Similar layering can be used for hair and accessories.
Facial details can also make a major difference. Carefully positioned eyes, eyebrows, lips, and other features can give the character a more expressive appearance. The proportions should remain consistent with the size of the head.
Texture is another important element. Yarn, fabric, paper, and other materials can introduce different surfaces that contrast with the cardboard base. These differences can make a handmade doll visually more interesting.
How to Customize a Cardboard Ragdoll
Customization is one of the main reasons people enjoy handmade dolls. You can choose the color palette, hairstyle, clothing, facial design, and accessories according to your preferred style.
The clothing can be changed easily by using removable paper or fabric pieces. This makes it possible to create a collection of outfits without rebuilding the entire doll.
The hairstyle can also be customized using different materials and arrangements. Long, short, straight, curly, layered, or braided styles can all be represented through simple craft techniques.
You can also change the size of the doll. A larger cardboard ragdoll may be easier to decorate because it provides more working space, while a smaller doll can require more precision and patience.
How to Make a Cardboard Ragdoll With Movable Limbs
A movable cardboard ragdoll requires slightly more planning than a simple flat design. Instead of cutting the arms and legs as permanent extensions of the body, separate them and create attachment points.
The attachment points should be positioned where natural joints would normally occur. Small holes can be made in the corresponding sections, and suitable fasteners can connect the pieces.
The holes should not be unnecessarily large because oversized holes can weaken the cardboard. Make them only large enough for the selected connector.
After attaching the limbs, move them gently in different directions. If the cardboard begins to tear around the joint, reinforce the area with an additional small piece of cardboard or another suitable support material.
Safety Tips for Making a Cardboard Ragdoll
Safety should always be part of the crafting process. Scissors, craft knives, cutting tools, and adhesives need to be handled appropriately.
When using a craft knife, always cut away from your body and work on a protective cutting surface. Keep the blade controlled and avoid holding the cardboard directly beneath the cutting path.
Children should receive appropriate adult supervision when using sharp tools or strong adhesives. Younger children can participate in safer activities such as drawing, coloring, arranging decorations, and selecting materials.
The workspace should also remain organized. Loose tools, scraps, and sharp objects can create unnecessary hazards. Keeping the work area clean makes the project safer and more comfortable.
Common Mistakes to Avoid
One common mistake is choosing cardboard that is either too thin or too thick for the intended design. Very thin cardboard may bend easily, while extremely thick cardboard can make detailed cutting difficult.
Another problem is rushing through the cutting stage. Uneven cuts can affect the appearance of the entire doll, especially around the face, arms, and legs. Slow and controlled cutting usually produces better results.
Using too much glue is another issue. Excess adhesive can spread onto visible surfaces and make the finished craft look messy. Apply only enough glue to secure each piece.
Poor planning can also create problems. If clothing, hair, or accessories are attached before the main structure has been checked, later adjustments may become difficult.
It is also important not to overload the cardboard with heavy decorations. The basic structure needs to remain strong enough to support everything attached to it.
How to Fix a Damaged Cardboard Ragdoll
Cardboard is relatively easy to repair when damage occurs. Small tears can sometimes be reinforced from the back with another piece of cardboard or strong paper.
If an arm or leg becomes detached, inspect the joint before reattaching it. The original connection may have become weak, so adding a small reinforcement layer can provide additional support.
For damaged decorative elements, remove loose pieces carefully and replace them with fresh material. Avoid repeatedly applying glue over an already damaged area because this can create a bulky surface.
If the cardboard has become bent, place it between flat surfaces and allow it to rest. Severe bends may not disappear completely, but careful handling can reduce further damage.
How to Protect a Cardboard Ragdoll
Because cardboard absorbs moisture, keeping the finished ragdoll away from water is important. Store it in a dry environment where humidity is relatively low.
Dust can also collect on decorative surfaces. A soft, dry brush can help remove dust without damaging fragile decorations.
If the ragdoll is intended for long-term display, placing it inside a protective container can reduce exposure to dust, moisture, and accidental damage.
Avoid placing the doll under direct sunlight for extended periods if it contains colored paper, markers, or other materials that may fade over time.
How to Make a Cardboard Ragdoll More Durable
Durability begins with the cardboard selection. A sturdy base provides better support for the finished design. If additional strength is needed, two layers of cardboard can sometimes be attached.
Reinforcing important areas such as joints, the neck, and narrow limbs can also improve durability. However, reinforcement should be applied carefully so it does not make the design unnecessarily bulky.
The adhesive you choose also affects durability. Lightweight paper decorations may require only a small amount of craft glue, while heavier materials may need a stronger adhesive suitable for the surfaces involved.
Handling is equally important. Even a well-constructed cardboard ragdoll can become damaged if the limbs are repeatedly bent beyond their intended range or if the doll is exposed to moisture.
Creative Ideas for Decorating a Cardboard Ragdoll
There are many ways to decorate a cardboard ragdoll without changing its basic structure. Colored paper can create clothing, patterns, shoes, and accessories, while markers can add fine details.
Fabric can introduce a softer visual texture. Small pieces can be used for clothing, scarves, decorative elements, or other details. Make sure the fabric is lightweight enough that it does not put excessive stress on the cardboard.
Yarn is useful for creating hair and other textured elements. Different lengths and arrangements can produce different visual effects.
Layered paper can also add dimension. Carefully cut shapes can be attached to the body to create raised clothing details, decorative patterns, or accessories.
How to Choose the Right Size
The ideal size depends on the purpose of the cardboard ragdoll and the amount of material available. A larger doll provides more space for facial details and clothing, but it also requires more cardboard and decoration.
A smaller design is easier to store and can be completed with fewer materials. However, small details may require more precision because the working area is limited.
For beginners, a medium-sized design can provide a comfortable balance. It gives enough space to practice cutting and decorating without requiring an unusually large amount of material.
How to Make the Project Easier for Beginners
Beginners should focus on the basic structure before attempting highly detailed designs. Start with a simple body shape, clear facial features, and lightweight decorations.
Prepare all materials before beginning. This helps prevent interruptions and allows you to concentrate on the design rather than searching for supplies during the project.
Work through the project in stages. Finish the cardboard structure first, then add the face, hair, clothing, and final decorations. This approach makes it easier to identify and correct structural problems before they become hidden beneath decorations.
Patience is especially important. Handmade crafts do not need to be perfect to be enjoyable, but careful work can make the final result stronger and more attractive.
For additional guidance on safe and creative craft activities, readers can explore the craft and activity resources available from Crayola. These resources provide ideas and general information that can help beginners develop their creativity while working on different handmade projects. When making a cardboard ragdoll, always choose appropriate materials and use scissors, craft knives, glue, and other tools carefully according to their intended use.
FAQ
How to make a cardboard ragdoll at home?
To make a cardboard ragdoll at home, start with clean cardboard, plan the doll’s shape, draw the outline, and carefully cut the main body. You can then add separate limbs, facial features, hair, clothing, and decorations. The design can remain simple or become more detailed depending on your crafting skills and available materials.
What type of cardboard is best for a ragdoll?
Medium-weight cardboard is generally practical because it is strong enough to hold its shape while remaining manageable during cutting. The ideal thickness depends on the size and structure of the doll. Cardboard that is clean, flat, and free from significant damage is usually easier to work with.
Can children make a cardboard ragdoll?
Children can participate in making a cardboard ragdoll, particularly during activities such as drawing, coloring, arranging decorations, and attaching safe lightweight materials. Sharp cutting tools and certain adhesives require appropriate adult supervision, especially for younger children.
What can I use for cardboard ragdoll hair?
Yarn, colored paper, fabric strips, and other lightweight craft materials can be used for cardboard ragdoll hair. The material should be easy to attach and light enough that it does not pull heavily on the cardboard head.
How can I make a cardboard ragdoll move?
You can make a cardboard ragdoll move by cutting the arms and legs separately and connecting them to the body with suitable joints. Small fasteners can allow the limbs to rotate. The connection should be secure while still allowing controlled movement.
How do I decorate a cardboard ragdoll?
A cardboard ragdoll can be decorated with colored paper, markers, fabric, yarn, ribbons, and other lightweight craft materials. Facial features, clothing, hair, patterns, and accessories can all be added after the basic cardboard structure is complete.
How do I make a cardboard ragdoll stronger?
You can make a cardboard ragdoll stronger by choosing sturdy cardboard, reinforcing important joints, and avoiding excessive weight from decorations. Additional cardboard layers can provide support where extra strength is required.
Can a cardboard ragdoll be reused?
A well-made cardboard ragdoll can be reused for decoration or creative activities as long as it is stored carefully and protected from moisture. Movable parts may require gentle handling to prevent the joints from weakening.
Final Thoughts
Learning how to make a cardboard ragdoll is a simple DIY project that combines creativity, planning, cutting, assembling, and decorating. With cardboard and a few basic craft materials, you can create a handmade doll without needing complicated equipment or advanced crafting skills.
The most important part of the process is starting with a clear design. Planning the size, body shape, limbs, facial features, clothing, and decorations before cutting can make the project much easier. Careful cutting and thoughtful assembly can also improve the overall appearance and durability of the finished doll.
Once the basic structure is complete, the creative possibilities become much wider. Hair, clothing, colors, textures, accessories, and movable limbs can all be added according to your preferred design. You can keep the doll simple or gradually add more detail as your crafting skills improve.
A cardboard ragdoll also demonstrates how ordinary materials can become something creative and useful. With patience and careful work, a simple piece of cardboard can be transformed into a unique handmade character that can be displayed, customized, or used as part of a larger craft project.
Whether you are completely new to DIY crafts or already enjoy handmade projects, how to make a cardboard ragdoll is a useful skill to explore. Start with a manageable design, work carefully through each stage, and focus on creating a finished piece that reflects your own creativity.